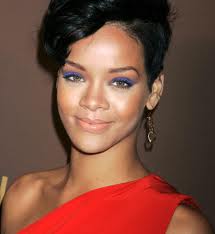
Showing posts with label eye makeup. Show all posts

Saturday, April 23, 2011

Different Eyeliner Looks

Natural 

To achieve a natural look, line only the upper outer with a pencil or liquid eyeliner. Get as close to the eyelashes as you can. Try to keep your hand steady to create a very thin line. Also use a pencil that is sharpened or a thin brush if you are using liquid liner. If you have close set eyes, line them in the outer half or two thirds of the eyelid, this will make them look further apart. 

V-Shape

This liner is a bit more dramatic and bold. Use a thin eyeliner, and line the top of the eyelid. Then continue the liner at the lower lashes creating the V shape. Smudge the eyeliner so there are no hard lines. 

All Around 

Line the upper and lower lid. It is up to you to decide whether you want a thin or thick line. If you have a larger lid then a thick liner can be done. For a smaller lid, it is better to stick to a thin line because a thick one will make your eye look smaller. Make sure to smudge the bottom liner, you can do this with a Q-tip. 

Smudged Rocker Look

Quick way for a night out, or to make a statement. Line the top and bottom lid with a thick line. Then smudge with a Q-tip or brush. Smudge the liner to create a cloudy rock star look. 

Cat Eye (the wing)

Using liquid liner or gel, line the top and extend upward from the outer corner. Try doing it in short strokes if you are not comfortable doing this. Try to create a triangle in the corner and then fill it in, this will create the "wing". 


Until Next Time, 
The Wicked 

Thursday, April 21, 2011

Eye Makeup Solutions for different Eye Shapes

To help identify what your eye shape is, look in the mirror and notice the amount of visible eyelid between your upper lashes and your brow bone. 

Small Eyes 

Extend the liner beyond the corner if your eye this will make your eyes appear bigger. Use lighter shades or with slight shimmer on the lid this will help open your eyes. Try to keep dark colors to a minimum because they will make your eyes appear smaller than what they are. Also if you line your eye all around they will look smaller. Instead line the bottom rim with white or a skin color liner. Applying mascara to both the bottom and upper lashes will definitely open your eyes. Try adding a couple of layers to add length to your eyelashes.  If you want your eyes to stand out even more, maybe for a special occasion, consider wearing false eyelashes. 

Prominent Eyes

Try using medium to deep shades on the upper lid to help minimize their appearance. If you don't want your eyes to look scary big or too prominent avoid light eyeshadows because they will bring them out even more. A thicker eyeliner will help your eyes look less prominent. However, if you want a thick liner yet, soft, try smudging and blend it. 

Deep-Set Eyes

Always use paler shades around the eyes to enhance them. You will want to avoid dark colors because this will make yours eyes look sunken in, so it will not flatter them. But you can try light colors with shimmer to make your eyes appear even. You can still you eyeliner. Also use a lot of mascara to bring out your eyelashes. 


General Rule
Dark eyeshadows add depth too


Until Next Time, 
The Wicked 

Sunday, April 17, 2011

100th POST!!!!!!!


So, this is our 100th post, because of this I decided to create a look. I decided to use purple and black because those are our colors. I would also like to thank everyone that has been following us and reading our posts. We would love to hear any comments or suggestions you guys have. 


The colors did not come out really well, neither did the photos. I have a really hard time getting good pictures when I do my makeup. 


What I used:

Primer- Urban Decay Eyeshadow Primer
Base color- Urban Decay Eyeshadow in Grifter
Crease- Urban Decay  Eyeshadow in Ransom
Outer V- Urban Decay in Zero
Inner corner- MAC Silver Dusk
Top Liner- MAC Fluidline in Blacktrack
Bottom Liner- Urban Decay 24/7 Glide-on Pencil in Zero then set it with Urban Decay Shadow in Zero


Until next time,
The Wicked

Monday, March 28, 2011

Eye Makeup Ideas to Try

Copper Eye Makeup 


Copper eye makeup can look very elegant, simple, yet can really bring out your eyes. For this look you will try a shimmery copper eyeshadow, use lightly and then build the color. You can also put some of the copper eyeshadow to line the bottom line of your eyes, make sure to blend. Also try lining your water line with white eyeliner. 

Cat Eye Makeup 


So if you are looking to stand out from the crowd try the cat eye look. To create this look you will want to try it with a think brush and it does take some practice to achieve. You should start out thin then build your line to as thick as you want. Since this liner is pretty dramatic you will want to keep the eye shadow neutral and simple. 

Navy Eye Makeup 


This is a great color to try for a softer smokey eye. It also brings out your eyes if you have hazel or brown eyes. Try pairing it with grey eyeshadows as a base then add the navy blue to the contour of your eye. 

Until next time, 
The Wicked 

Wednesday, March 16, 2011

Steps to Applying Makeup- The Professional Way


The steps below are based on what I learned during my course in Make-Up Designory in Soho, New York. This is an execellent school, pricey but worth it. http://mud.edu/School-Site-2010/. Most professional makeup artist work in this sequence to be more efficient. 

Most people like to start with their eyeshadow however, the face is first. This is because applying the makeup may take the most time since some people's skin can be a bit of a challenge to match. Also if you do the rest of the makeup first it becomes very hard to work around. By applying the makeup to the face first you will have a clean and even canvas to begin with. 

Face Make-up

1) Clean face- Fresh, and clean face with moisturizer or your skin care regime.  A skin toner works great to absorb any oil on the face. This will give the skin a fresh feel. Some like to use Witch Hazel as a skin toner just make sure to get one that does not have alcohol, otherwise it will dry out your skin after some use.

2) Primer (optional)- The face is primed with face primer and eye primer. (see previous posts for more on face primer and eye primer)

3) Concealer and Foundation- First apply the concealer under the eyes and wherever else it is needed. Next apply your foundation in small increments to have a flawless and blended foundation.


4)Loose Translucent Powder- With a large powder brush, exceed tapped away, apply the powder very lightly over the face. Especially in areas that gets oily throughout the day. If you have dry skin you may want to skip this step because it may make you skin look drier. Also, if you have combination skin you can just apply the powder where you need it instead of all over the face.


Eyes

5) Tissue (optional)- You may place a tissue under the eyes in order to catch any loose pigments that fall from the eyeshadow. Personally I do not do this, I barely have a problem with this. I find that if you tap the excess amount of eyeshadow from the brush, you will not have a problem. However, if I do have some fall out I just clean it up with a small amount of foundation and a sponge. But, when working with dark eyeshadow, like for a smokey eye, you will want to be really careful because if you make a mess it will ruin your foundation and will look muddy.

6)Eye Shadow- For most eye shadow techniques, placement of eye shadow starts with the base shade (usually the lightest) and it is applied from the lash line to the brow bone (depends on how dark the color is). Next , a slightly deeper shade is applied between the brow bone and the upper lid area, called the crease. Finally highlight along the brow bone.
For multiple shades-  Apply a base color, next place a medium shade wide and soft along the crease of your eye. Make sure to blend it and not to go to high with dark colors, meaning not close to your eyebrows. Then, apply a darker shade finely and precisely on the crease this will give you defined and dimensional look.  (for smokey eye see post: "Smokey eyes 101- Do's and Dont's" and "Smokey Eye")


7)Eye liner- Apply eye liner along the lash line. You can go thin or thick, depending on what look you are going for.

8)Eye Lash Curler- Curling your eyelashes will open and brighten your eye. This will also make you lashes longer since they curl up.


9) Mascara- Place the wand at the base of the eye lashes and jiggle it as you move the wand up through the eye lashes. By jiggling it you will avoid getting spidery lashes and will give you a more defined look.

10) Brow- Fill in your eyebrows (see post) brush, or put eyebrow gel to keep them in place. ( you can do this step before applying eyeshadow, doesn't matter. I do my eyebrows right after my foundation)

11) Clean up- clean up any fallen eyeshadow or mistakes with a Q-tip.

Cheeks and Lips 

12)Contour- Apply a conturing powder on your cheek bones, this goes right below your blush or do the fishy face to have a better idea of placement.


13) Blush and highlight- Apply blush above the contour and then highlight below your eyes.

14) Lips- Apply liner (if needed), lipstick or lipgloss.

All done now!! This seems like a very long process but once you get used to it you will do it in a few minutes. Practice makes perfect!!

Until next time,
The Wicked