Showing posts with label Sally Hansen. Show all posts

Wednesday, May 30, 2012

New Sally Hansen Rock Of Ages Salon Effects Real Nail Polish Strips

I saw Rock of Ages a couple years back and LOVED it! Oh yes, nothing better than some good ol' rock and roll.

(enlarge for a better view)
Left to right:
Amp It Up- purple with black guitars
Zip It!- Sparkly silver with black zipper
Red-y To Rock- Red and white zebra/tiger print
Fingerlace Gloves- White base with black lace pattern
Star Quality- Pink base with dark blue stars
Good Genes- Destroyed denim pattern
Sticks and Stones- Red, black and white abstract pattern

I'm kind of underwhelmed with these, I think they could have been a lot cooler. I do like Fingerlace Gloves a lot, but the others are a little lacking for me.

What do you guys think about these?

Until next time,
The Wicked

Tuesday, May 8, 2012

Nail Polish Haul!!

I've been buying a bunch of nail polishes recently, most of which were bought yesterday. So, I'm going to show you my haul!

Here we have the seven polishes that I've accumulated within the past few weeks. 

From Rite Aid:
Sally Hansen Rock Bottom
Chameleon Nucleus
The dumbbell shaped one (no brand or color name, but it's a color change polish)
Magnetique (no color name, but it's the blue one) 
Jesse's Girl Glee

Then I got OPI Just Spotted the Lizard at the mall, and like two weeks ago I ordered A England Saint George. I tested all of these, and actually wore Saint George for about a week, but of course, it's been super cloudy and I haven't been able to get a good picture. 

I also have two Deborah Lippmann polishes coming in the mail. So that will make nine polishes in all. I'm really excited about everything I've gotten because my major goal is to get polishes that I haven't tried yet. Out of all nine, there are seven brands that I have never tried and some I've never even heard of. 

It's supposed to be cloudy for the rest of the week, but hopefully the sun comes out so I can start swatching and do individual reviews on everything!

Until next time,
The Wicked

Wednesday, May 2, 2012

Gradient and Leopard Print!

I finally learned the trick to gradient nails!

Yes! The polishes I used are Sally Hansen Blue It, Sinful Colors Black on Black, OPI Alpine Snow and Milani Twinkle.

For the gradient nails, I did two coats of Blue It then took a make up sponge, painted a strip of Black on Black and a strip of Blue It and then blotted it on my nail until it looked blended. I could have blotted a little bit more, now that I look back.

Then I did a freehand leopard print on my ring finger. I did a coat of Black on Black as the base then made some spots of Twinkle (which took a little maneuvering of glitter), then used Alpine Snow and a tooth pick to draw the spot outlines. I found that it was much easier to use a toothpick than a detailing brush. A dotting tool would also work, I just don't have one. 

Then I did a coat of Essie Good To Go on every nail. This mani actually lasted almost a week and I did not pick at it once! I really like how it turned out and I'll definitely be trying out some other gradients!

Until next time,
The Wicked

Tuesday, January 24, 2012

New Sally Hansen Salon Effects for Valentine's Day!!

With Valentine's Day approaching faster than I anticipated (I'm seriously behind on all holidays/ fake holidays) I thought I would share the new Sally Hansen Salon Effects for Valentine's Day.

Left to right:
Are You Single?
Speed Dating
How Romantic!
Love Always
Cross My Heart

These were supposed to be available beginning in February, but I have already seen them in stores. I haven't tried the Salon Effects, but a friend of mine uses them all the time and really likes them. I'm also not a big Valentine's Day person, but these are pretty cute. I like Love Always and Are You Single the most. 

These retail around $9.99, depending where you buy them.


Until next time,
The Wicked

Sunday, January 22, 2012

New Wet n' Wild Megalast and Sally Hansen Smooth and Perfect Color Care Collections!

Last time I was at Harmon's Discount, I noticed some new displays and had to take pictures of them for you guyssss

The first one I saw was this new Sally Hansen Smooth and Perfect Color Care collection


The display says "Hides ridges with a breathable, porcelain smooth finish"
- Promotes stronger, healthier looking nails
-Allows 20% more oxygen to reach nails
-Streak free
- Patented formula

So this seems to be boasting a lighter, healthier formula for you nails. The colors are all pastels and neutrals and I'm pretty sure they are all creme finishes. I think they ran around $4-5 a bottle, but I can't really remember.


Then I saw this new Wet n' Wild Megalast collection

The display says "Salon- quality opaque color provides 5 days of long lasting, chip resistant wear."

The first thing I thought of was Sally Hansen Salon Complete Salon Manicure polishes. The bottle shape is pretty similar, but not exactly the same and it seems to advertise the same sort of quality. These are nice bright colors that are great for spring and there were also some neutral shades thrown in. All these polishes also had creme finishes and they are $1.99, wayyyyy cheaper than their Sally Hansen counterparts. My grandma actually picked up two of the shades that I have swatches of below!

Wet n' Wild Megalast in Through the Grapevine, one coat. This is actually a little darker and a little more purple in real life. My camera decided to make everything look lighter that particular day. Anyway, this is a creme purpley-pink color. 

Wet n' Wild Megalast in Candy-licious, one coat. This one is actually more bubblegum pink in real life, definitely a little darker and brighter than in the picture. 

So the formula on these is AWESOME. Seriously. They were both completely opaque in one coat, which is amazing. The formula is smooth and has great coverage and pigmentation. The brush is a little odd, it's one of those flat, beaver tail like brushes, but not too bad. I think the awesomeness of the formula makes up for it. I'm completely impressed and I'll probably be going back to the store to get a few more of these to see if the formula is this good across the board.

Have any of you seen or tried any of these new collections?


Until next time,
The Wicked

Saturday, December 31, 2011

Happy New Year Nails!

Happy New Year's eve and an early Happy New Year to everyone! We had a little crisis for about two days where the blog got somehow deleted (I almost had a heart attack), but it's back now and his is my New Year's eve mani!

Crazy glitter explosion!
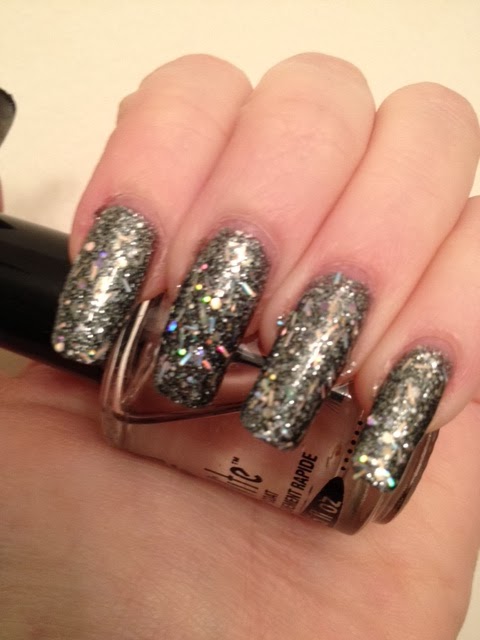
Two coats of China Glaze Tinsel Town, one coat of Forever 21 Silver (large and small holo glitter) over that and then one coat of Sally Hansen In the Spotlight (holo bar glitter) over that. Then of course trusty Seche Vite to smooth everything out.  Sorry this is a little blurry, but you can enlarge it to get the details of the various glitters I used. 

I really like the all the different shapes of holo glitter over the dark glitter and base of Tinsel Town. Definitely gives it more dimension and tons of added sparkle.

We, here at We are The Wicked, want to wish you guys a super awesome, fun and safe New Year! Hope you continue to follow us in 2012!!!

Until next time,
The Wicked

Friday, October 21, 2011

Blood Drip nails! New Stila nail polishes! OPI App update!

I really liked the Blood Splatter mani that I did, but I wanted to try and do something that looks like dripping blood. This is what I came up with.

So first I did two coats of OPI Mummy Knows Best, then I look Sally Hansen Xtreme Wear in Cherry Red and put a little blob of it at the top on my nails, then took a tooth pick and dragged it down. And then Seche to smooth it out.

Depending how you look at it, it could look like flames, which is cool too. I may have to try it with flame like colors and see if it still looks like fire. 

So, all of a sudden today everyone started tweeting and talking about Stila just coming out with nail polishes. I was at work, so I didn't have a chance to check my email but when I got home, there it was, an email from Stila about their nail polish. They came out with two, four polish collections.

The Delicate Collection
Left to right:
Icicle - clear base with rainbow multi colored glitter
Stardust - clear base with pink and purple glitter
Chandelier - champagne base with gold and silver pearl
Kitten - clear base with deep purple and rainbow colored glitter


The Daring Collection
Left to right:
Confetti- clear base with green, red and gold glitter
Firecracker- clear base with ruby red
Disco Ball- clear base with purple and teal glitter
City Lights-  gold with rainbow multicolor glitter

Both these collections are available now on Stilacosmetics.com


And finally, OPI has updated their iPhone app. 

OPI announces the re-launch of the OPI Application for the iPhone® and iPod Touch®. The updated OPI App continues to offer an easy, free way to browse and search over 200 OPI nail lacquer shades – now at faster speeds. The Try It On Color Studio continues to provide a look at all current OPI shades, while the search feature now incorporates retired shades, allowing users to view past favorites and information about the year in which those hues were retired.
The updated OPI App also includes higher resolution images to further enhance visual displays. In addition to running faster, the application now has the capability to wait in the background while other programs are used, namely Facebook. This feature gives users the option to check OPI’s Facebook page without having to leave the OPI App.
“The improved OPI App gives fans the chance to try on lacquers easier than before. The App’s Try it on Studio has been hugely popular, and we are happy to improve upon and expand it. It’s a great resource when choosing your lacquer at the salon, since you can get an idea of how a color looks on your hand before committing,” explains Suzi Weiss-Fischmann, OPI Executive VP & Artistic Director. “The portable nature of the OPI App makes it easy to take while shopping and choose a lacquer shade to accessorize any new dress, top or jacket right there in the store!”


The OPI App also includes a search bar with word prompt technology; after typing just a few letters, any possible options will be proffered. Since its original debut, the App has added a sort-by-collection feature, highlighting current collections and promotions so that users will know what’s new to the brand. The App even lets users select favorites, storing lacquer choices for future reference.


Wednesday, October 5, 2011

Manglaze Mayo!

I was going to continue on with the OPI Spookettes, but then my Manglaze consolation prize came in the mail on Monday and it came with a mini of Mayo! I was so excited because I've been wanting to buy it since it was released but just never had the effort. But now I have it!


First, bottle shots! I always love the Manglaze bottle art.


(finally a good picture on the first try!)
Mayo, four coats. Kind of reminds me of a white wall, pretty cool. When you apply the polish it looks pretty iridescent and shiny, but then it dries and loses most of that. You can kind of see the sparkle in really direct sunlight, but just slightly. 

The formula was slightly sheer, that's why it took so many coats. I was debating about leaving it at three coats, but I kept looking at my nails and I could still see my nail beds which was just annoying so I had to do the fourth coat. Just to warn you, you need to let each layer dry before applying the next one or it will take forever to dry. Even though it may look dry because it becomes matte right away, it probably really isn't dry. So just beware of that.

But I couldn't break my all Halloween nail challenge, so I had to add to the Mayo! I was going to do a ghost but then got lazy and did candy corn instead! The yellow is Sally Hanses Insta-Dri in Lightening and the orange is OPI He's My Boo, from Spookettes. I did it all free hand pretty quickly, so excuse any not completely straight lines. Should I do all my nails like this? Hmm, I think its really cute. Definitely like it more than I thought I would.

So next the nest post will be He's My Boo. After I used it today, I'm pretty impressed and excited about really testing it out. 

Until next time,
The Wicked

Sunday, September 25, 2011

Fall Trends: Military Green!

I've been looking around for a military green and can't seem to find one... not that I'm looking that hard, because they are everywhere for fall! So, on a whim, I decided to mix up my own.

Sorry about the blurriness, and you'll probably have to enlarge this. But yeah, I used Sally Hansen Xtreme Wear in Green with Envy and then I mixed in a few drops of OPI You Don't Know Jacques. It came out this pretty cool olive color. It's a little darker in real life than in the picture. It's super dark right now so I couldn't get an accurate picture. Also, it's super shiny because it's still pretty wet. I like it though. I'll try to take a better picture in the sunlight and show that to you guys in my next post.


Until next time,
The Wicked

Wednesday, September 21, 2011

How to make your own nude nail polish!

Yay DIY! In my last post I said that i would show you guys how I made my nude polish, so here we go.


What you need:
1. nail polish
2. tooth pick
3. somewhere to mix your colors, like a palate

These are the colors I used. Left to right: OPI You Don't Know Jacques,Sinful Colors Snow Me White, Sally Hansen Instra-Dri Lightening, Sally Hansen X-treme Wear Cherry Red

First, start with a white polish. If you want to do a full manicure, make sure you put enough polish so you'll have enough for at least one coat per nail. This was about four drops, just to do a test color.

Then put in a few drops of brown. Make sure not to use to much or it will darken the polish too much.

Next, a drop of red.

And finally a drop of yellow.

Now it's time to mix it all up with your toothpick!

And there you have it! Custom nude nail polish! You can adjust the color by adding more white, brown, red or yellow, depending on your skin tone or preference. 

If you want a whole bottle, you can also mix colors into the white nail polish, straight into the bottle, but it is harder to judge how much to use and it is harder to mix. So, you may want to pour out the contents of the white and mix your color then pour it back into the bottle. If you do it this way, make sure to mix your polishes in something sturdy. The nail polish will eat away at plastic cups so stay away from those.

After I did this, I did do a whole bottle of it (obviously). It came out a little bit lighter than the shade above.

Until next time,
The Wicked

Thursday, August 4, 2011

Sally Hansen Ice Queen

A very early post today! This one was a very random, unplanned purchase for me. I was in Walgreens looking for something else, which my Walgreens sadly didn't have. I also realized that no one goes to my poor Walgreens because they still have a full stock of Revlon Black with Envy! So crazy. Anyway, I always look at the displays first and this caught my eye.

Look familiar? Definitely reminded me of something.

(the base is actually lighter in real life)
Yes! Deborah Lippmann's Glitter in the Air! 

They're definitely similar, but Ice Queen is far from being a dupe. They both have the pink and blue larger hexagonal glitter and silver micro glitter. On the other hand, Glitter in the Air has a milkier base, while Ice Queen has a clear base. Also, Ice Queen has silver micro glitter and holo micro glitter. And the colors of the larger glitter vary somewhat. Glitter in the Air has baby blue and baby pink, very soft shades, while Ice Queen has a more cerulean blue and orchid pink/purple that are more vibrant. 


(shade)

(sunlight)

Two coats of Sally Hansen Ice Queen over one coat of Brucci Alexandra's "Hot" Gray. The larger glitter is pretty sparse so you definitely nee the two coats and you really need to make sure that you have glitter on the brush, or you'll end up with none. 

Overall, it's a pretty good glitter. The larger pieces are a little sparse, but it's not too  bad to deal with. It dries pretty quickly, but definitely use a top coat, preferably a fast drying one. I do think it's a decent alternative to Glitter in the Air and at $1.99 you really can't go wrong.

Until next time,
The Wicked

Monday, July 25, 2011

Nail Art: 21st Birthday!

It was my friend's 21st birthday a month ago and I did these sweet birthday nails and forgot to show them to you!


The base for all of them is OPI Alpine Snow and a slew of other colors for everything else. 

Thumb- Sinful Colors Black on Black for the words then a coat of Sally Hansen In the Spotlight
Index- Sinful Colors Black on Black and Revlon Silver Dollar
Middle- OPI You Don't Know Jacques for the frosting (supposed to be a cake lol) and Sinful Colors Black on Black and Sally Hansen Insta-Dri in Lightening for the candle
Ring- a bunch of different polishes, including Sally Hansen, Revlon and Orly for the balloons and Sinful Colors Black on Black for the strings. Oh, and I used Alpine Snow to highlight the balloons
Pinky- Orly Frisky for the box and OPI Siberian Nights for the ribbon and bow.

And of course, trusty Seche Vite to finish everything off.

Until next time,
The Wicked


Tuesday, July 5, 2011

Fouth of July nails!

I knew I wanted to do something 4th of July related, but I really didn't want to go all red, white and blue. So, instead I decided to fireworks nails.


You can enlarge the picture by clicking on them to get a better view. I used Brucci Black and Blue as the base color, it's a very dark blue and was supposed to represent the night sky. Then for the fireworks, I used lots of different colors and a detail brush and just made dots to look like exploding fireworks. I think it came out pretty well, people could tell that it was fireworks.

Until next time,
The Wicked 

Friday, July 1, 2011

Minions!!

I was again inspired by Despicable Me, the minions are just so cute.


First I tested it out on my thumb and Kevin was born! He was my favorite. 

Then, a few days later came the rest! My sister and I named them all. Left to right: Larry, David, Phil and Stewart.

Obviously I had to use a slew of different polishes. The base is Sally Hansen Instra-Dri in Lightening, the overalls are Sally Hansen Xtreme wear in Blue it, the eyes are OPI Alpine Snow and You Don't Know Jacques, the goggles are Sally Hansen Xtreme wear in Gunmetal and Sinful Colors Black on Black, the hair and mouths are also Black on Black. For the ones with their mouths open, I used Alpine Snow and some unnamed Milani pink mixed with white. And finally, I used a coat of Seche Vite.

I had them for a pretty long time by my standards and you can kind of see the wear at the tips. But I loved them and actually kind of miss them now that they're gone. 

Also, if you haven't heard of the blog Burgers and Nails, you should definitely check it out. I submitted a picture of my minions here and a burger, so keep an eye out for that. Hopefully it'll go up in a few weeks.

Until next time,
The Wicked

Monday, May 16, 2011

Revlon Black with Envy!

Victory! I was in Walgreens completely not looking for this and out of the corner of my eye I saw a whole display for it. My Walgreens must be seriously behind the times, because this has been sold out forever and last time I went looking for it, it was nowhere to be found. If you recall, I did a girl on a budget post about this comparing it to Chanel Black Pearl. So here are the swatches!

(flash)

(no flash and kind of blurry)

Well it is completely overcast here in the Northeast, so taking pictures is a complete pain because nothing looks right in artificial light. The picture with flash is pretty close to how it looks in person, but it looks a little too metallic in the picture. It has a glossy finish like in the bottom picture, but the color is a little more grey rather than blue-toned like it looks there. Also, it almost looks creme in in the bottom picture, but you can see the shimmer in person. So mix the two pictures together in your minds and you'll have it!

Anyway, I have on two coats and a top coat. The formula is smooth and even but the polish is a little sheer, more sheer than I expected. It's fine with two coats but I probably should have done three, oh well. The color is a dark grey with silver almost light blue shimmery flecks or flecky shimmer (find of a mix between flecks and shimmer. It's really nice). 

I've been looking at swatches of Black Pearl and they are veryyyyy similar. It was less than $6 so I suggest everyone go and double check Walgreens! ALSO!! While I was there I saw that Sally Hansen has a whole new crackle collection. Confused? Yeah I was too. I had no idea this was coming out, totally caught me off guard. There is blue, white, silver, black, gold, red? and possible something else that I don't remember. I was going to get the white or maybe silver, but I'm planning to get those from OPI so I didn't get them. They were $6 or $8 each ( I don't remember lol) so the price isn't that much cheaper than OPI. One of the bloggers that I follow read my mind and posted a review of the blue and gold this morning. So definitely check that out.


Until next time,
The Wicked

Tuesday, April 26, 2011

Nail Art Options

When thinking about nail art, most people don't realize how many options there are, but there are SO many! I'm sure some people like to have their nails just one color, but others need some options (like myself). So, I'm going to go through some different options for jazzing up our nails!


1. Nail Art Pens/ Polishes
 
So, these are pretty simple to understand. They come in a variety of colors and are made for detailing.

On the top are the Sally Hansen nail art pens that came out a few years ago. They're pretty interesting. After you use them, you need to do a top coat of they will actually wash off, which is super strange. They run about $6-7 and you can find them anywhere.

On the bottom, are LA Colors nail art polishes. You can see that the brushes are thin and pointed and they come in a variety of colors. There are lots of brands that have these kinds of polishes, they're also widely available. I actually haven't seen the LA Colors in stores, but I saw another brand and each one was $2.99


2. Nail Stickers


Also super simple to use, nail stickers are a great quick fix when adding to nails. There's no drying time or really any effort at all. You can find tons of these everywhere and pretty much any kind you want. These are really easy and are great for kids (and adults!).

I really love these, I might have to find them lol


3. Rhinestones


 Ahh, rhinestones. I do love sparkly things.

You can get rhinestones 2 ways: stick-on or not stick-on. The sticky backed ones come in sticker form, while the other ones come just like you see here
<------

They come in all different shapes and sizes and colors and are relatively easy. Obviously, ones with sticky backs are like stickers and therefore easy to adhere.


4. Stamping

Probably my favorite way to decorate my nails. This picture is of a Konad stamping set, but other companies do make these types of plates, people tend to call them "fauxnad" plates. Such simpler to use than it seems, it just takes a little practice. When buying Konad specifically, you can usually get bundles that include some polishes, plates and the stamper and scraper. I do recommend getting the Konad polishes because they dry on contact, but any polish will work. Because they dry so fast, you do have to work faster when using them.

You can get Konad on various websites. I use http://www.ocnailart.com/.

One alternative to Konad that is an awesome deal comes from Bundlemonster. It's 21 plates for $17. Yeah, awesome!


5. Nail Polish Strips
This is the newest thing when it comes to decorating nails. They are nail polish strips, no polish necessary. It completely simplifies the way you do nails. I'm not sure how the application is or anything, but I think it's a good idea, especially for people who don't have time to do their nails all the time. You can see that there are TONS of options here, some of them can be achieved with Konad, while others are definitely original.

When going with these I would suggest getting something original, like the butterflies, flowers or lace (my favorite!). Getting a plain color or even glitter wouldn't be worth it in my mind. They're $7-8 and I think you get one use out of each pack.


Until next time,
The Wicked

Monday, April 18, 2011

Girl on a Budget Part: Where to Buy

Last but not least with all this girl on a budget business, I've decided to give you all some tips on where to buy nail polish and such things.

1. Beware CVS! 
CVS claims to have great prices, and they do for some things, but nail polish is definitely not one of those things. This is true for Revlon polish in particular, they have them for Over $6, something like $6.79. That's crazy!!! Most Revlon doesn't go for more than $5 usually, the regular colors are around $3.

2. Discount beauty stores are your friend!
Sometimes it's hard to just hard to believe that you're getting the best price, but sometimes it all in the name. Beauty supply, or beauty discount stores usually do have some of the best prices. Brands like Revlon, Sinful Colors, Sally Hansen, Color Club and even Essie are usually $0.20- $1.00 cheaper than regular stores.

3. Not all drugstores are created equal!
As I said before, you should be weary of CVS, but Duane Reade and Walgreens usually have better prices.

4. Go to the mall!
Beauty stores at the mall are my secret weapon. Stores like Essentials and even some salon/stores at the mall usually have great deals on Essie and OPI. Not only do they sell them regularly for about $6.95, but they also have deals like 3 for $18 and sometimes 3 for $15! Those are by far the best prices that I've seen for those two brands. So, prepare to buy 3!

5. Internet, internet, internet!
There are plenty of places on the internet to get good deals on polish. Ebay and Amazon are likely to have some good deals if you dig around for them. Also, ulta.com/ has some really good deals. They have buy 2 get 1 free, and buy 2 get 2 free deals. I'd say definitely check that out.

Until next time,
The Wicked

Monday, March 21, 2011

Sally Hansen Gel Cuticle Remover

Since I started doing my own manicures, I've been looking for a good way/ product to do my cuticles. When I was looking for any time of cuticle product I came across this stuff.


It did come in a box, and I apologize about the backwards writing lol I used my computer to take the pictures instead of my camera.

The directions on the back say to apply a thin strip around cuticles and leave on for 1-2 minutes, then loosen and push back cuticles and then wash excess away with warm soapy water. It also says not to leave on for over 10 minutes and not to use more than twice a week. I'm not sure what will happen if you do, they decided not to specify. 

I've found that it works better when you leave it on for 2-3 minutes, then I use a wooden cuticle thing to push them back. It works pretty well if you make sure to leave it on long enough. You have to be careful when putting the gel on, because A LOT comes out if you're not gentle. It does a pretty good job and its not expensive so I'm a fan. When I run out, I'll try out some different ones and let you guys know which is better.

Until next time,
The Wicked

Monday, March 7, 2011

Tarina Tarantino vs Sally Hansen

I said I was going to do a comparison of these two polishes, so here it is.

(sun)

(shade)
Left to right:
Tarina Tarantino Empire
Sally Hansen HD Pixel Pretty
Empire
Pixel Pretty

Sadly, they are pretty much the same. I'd even call them dupes. I have 2 coats of Empire and 3 coats of Pixel Pretty. So, Empire is better pigmented while Pixel Pretty is more sheer during application. They are both a little on the watery side too. I'm kind of upset that they are so similar, I had such high hopes for Tarina (not that Sally Hansen is bad or anything.) So there you all go. Tarina vs Sally ends in a draw. 

Until next time,
The Wicked

Friday, February 25, 2011

Sally Hansen HD

Today I have an oldie but goodie, Sally Hansen HD in Pixel Pretty. These came out a good while ago, and I remember seeing the promo ad for these and being in love with this color. 

This color reminds me of islands and the ocean and sunshine, which is ironic because it is pouring rain here. I hope all you guys are having better weather than we are. 

So shiny. I wish the sun was out :(

The color is actually more of the color in the first picture but with the shine of the second. It's interesting. Since it reminded me so much of an island I decided to do an experiment.


It's and island! Hah. I did it free hand (I think I did pretty good!) and its still kind of wet in the picture. This is my first time doing anything like this free hand and I apologize for the blurriness of some of the pictures. I think its cute and it really makes me want to go on vacation. The trunk of the tree is OPI You Don't Know Jacques, the leaves are Sally Hansen Green with Envy, the sand is Wet n' Wild Shield and the sun is Sally Hansen Insta-Dri Lightening. Oh, and I did do a top coat of the love of my life, Seche Vite.

I was debating about doing this last night when I couldn't sleep. I was hoping I'd have my black shatter by now so I could do that, but sadly I haven't gotten it yet. Sad. But I like this. I only did it on my left hand and I'm not planning on doing it on my right ( I don't think my left hand could handle that kind of pressure). Well I hope you guys like it and I hope to have my black shatter and my surprise polish soon!

Until next time,
The Wicked